How to Crochet Cute Keychains: Step by Step Amigurumi Tutorial
Crochet DIY is a blg web site that have DIY videos
- 1 | 7

With the recent boom in handmade crafts, the art of amigurumi continues to capture the hearts of crafters worldwide. Whether you want to make a meaningful, personalized gift for a loved one or add a touch of personality to your bags and keys, making a crochet keychain is a fantastic project. Best of all, these mini projects require very little yarn and can be completed in under an hour, making them absolutely perfect for crochet beginners. In this comprehensive guide, inspired by the popular Myna Crochet style, we will show you how to use a single, simple base body pattern to create three completely different characters: a cute frog, a sweet duck, and a quirky little monster. Grab your hooks, pick your favorite yarn colors, and let’s dive into this fun crafting journey!
- 2 | 7

The Universal Base Body Pattern The ultimate advantage of these three designs is that the main head-and-body base is identical. We will first crochet the core rounded shape, and later customize it with distinct ears, beaks, eyes, or horns to bring each unique character to life. • Round 1: Make 6 single crochet (sc) stitches inside a magic ring (mr). [6] • Round 2: Increase (inc) in every stitch around. [12] • Round 3: Sc 1, inc – repeat 6 times around. [18] • Round 4: Sc 2, inc – repeat 6 times around. [24] • Round 5: Sc 3, inc – repeat 6 times around. [30] • Rounds 6 - 12: Sc in each stitch around (7 rounds total without increasing). [30] At this stage, you need to install the safety eyes depending on which character you are making. Generally, placing them between rounds 9 and 10 with about 5 to 6 stitches of separation works perfectly. Once the eyes are securely locked in place, stuff the body firmly with the polyester fiberfill.
- 3 | 7

• Round 13: Sc 3, decrease (dec) – repeat 6 times around. [24] • Round 14: Sc 2, dec – repeat 6 times around. [18] • Round 15: Sc 1, dec – repeat 6 times around. [12] • Round 16: Decrease all remaining stitches to close the gap, fasten off, and weave in the yarn tail. Character Customization and Details Once your base body is complete, you can choose which of the easy amigurumi patterns you want to assemble and begin crocheting the specific structural features.
- 4 | 7

???? The Cute Frog Variant What makes the frog stand out are its signature bulging eyes. For the eyelids, use green yarn to make 6 sc into a magic ring, increase to 12 sc in the second round, and fasten off. Insert or glue the black eyes into these green cups and sew them securely onto the top of the head. Use a thin pink yarn to stitch tiny horizontal lines right below the eyes for a charming blushed cheek look. ???? The Sweet Duck Variant Using a body crocheted in vibrant yellow yarn, take a small amount of orange yarn to embroider a tiny beak right in the center of the face. You can easily make a physical beak by crocheting 4 or 5 sc into a magic ring and sewing it between the eyes. To make the duck look even more adorable, you can add a small white tuft of hair or a tiny crochet bow on top of its head.
- 5 | 7

Character Customization and Details Once your base body is complete, you can choose which of the easy amigurumi patterns you want to assemble and begin crocheting the specific structural features. ???? The Cute Frog Variant What makes the frog stand out are its signature bulging eyes. For the eyelids, use green yarn to make 6 sc into a magic ring, increase to 12 sc in the second round, and fasten off. Insert or glue the black eyes into these green cups and sew them securely onto the top of the head. Use a thin pink yarn to stitch tiny horizontal lines right below the eyes for a charming blushed cheek look. ???? The Sweet Duck Variant Using a body crocheted in vibrant yellow yarn, take a small amount of orange yarn to embroider a tiny beak right in the center of the face. You can easily make a physical beak by crocheting 4 or 5 sc into a magic ring and sewing it between the eyes. To make the duck look even more adorable, you can add a small white tuft of hair or a tiny crochet bow on top of its head.
- 6 | 7

???? The Little Monster Variant This is where you can let your imagination run completely wild! After crocheting the base body in a vivid shade of purple, teal, or neon green, you can add tiny horns, spikes, or felt teeth to the head. When it comes to monsters, playing with asymmetry—such as giving it a single giant eyeball or three unevenly spaced eyes—creates a hilariously playful look. Essential Tips for Polished Amigurumi If you want your finished items to look clean, professional, and ready for retail, keep these expert tips in mind: 1. Maintain Tight Tension: Avoid loose stitches at all costs. Your crochet gauge should be tight enough so that the white fiberfill stuffing does not peek through the gaps when the keychain is stretched. 2. Always Use a Stitch Marker: Because amigurumi is worked in continuous spiral rounds, it is incredibly easy to lose your place. Use a plastic marker or a scrap piece of contrasting yarn to track the first stitch of every round. 3. Secure All Elements Extra Well: Keychains endure a lot of friction, tossing, and pulling inside pockets and purses. Double-knot all your threads internally and pass your sewing needle through the body multiple times to make sure no limbs drop off. Thank you for exploring this Haberzan craft guide! By mastering this basic 3-in-1 technique, you can easily build a colorful collection of keychains in no time—perfect as quick weekend crafts or as highly profitable items to add to your online handmade shop.
- 7 | 7

Sponsored
Sponsored
Sponsored
Sponsored
Sponsored
Sponsored
Sponsored
Popular Videos

Sponsored
Related Galleries
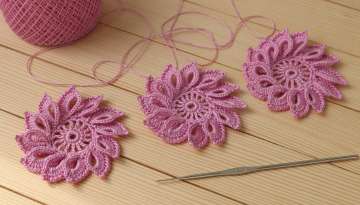
Simple crochet FLOWER MASTER CLASS knitting for beginners how to crochet a flower for beginners
1787
Sponsored
More