• How to Crochet a 3D Relief Handbag: Easy Step-by-Step Tutorial
Crochet DIY is a blg web site that have DIY videos
- 1 | 5

Crocheting your own fashion accessories is one of the most rewarding DIY projects you can undertake. Not only will you get a unique piece that suits your personal style, but you'll also learn new techniques along the way. If you're looking for a fresh, chic, and ultra-modern design, learning to crochet a handbag with a stunning 3D embossed texture is a perfect choice. In this comprehensive guide from Haberzan.com, inspired by Taller Manual Peru's wonderful tutorial, we'll detail how to create an elegant, textured handbag using a very clever construction method. This project is incredibly quick; you can easily finish it in just one afternoon. It's highly adaptable and serves as a perfect gift idea or a profitable item to sell in your handmade shop.
- 2 | 5

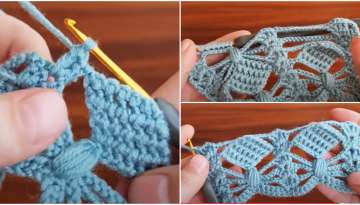
The Magic of 3D Embossed Strips The secret to this eye-catching bag lies in its unique texture. Instead of a traditional flat surface, this design is created by combining distinctly textured strips (listone) with high and low 3D embossed stitches and beautiful crisscross fans (1:1). To begin this project, you will use a 5.0 mm crochet hook and thick cotton or t-shirt yarn. The pattern begins with a basic loop and basic chain, immediately followed by beautiful puff stitches. Each strip combines these puff stitches with seven groups of unfinished double crochet stitches that slide together and create a gorgeous fan shape. The length of these strips will determine the overall dimensions of your bag. For example, if you want your bag to be 20 to 30 cm high, you will crochet each strip twice that length (approximately 60 cm), as the piece folds to create both the front and back panels. For a standard-sized modern bag, making three identical 3D strips is an ideal result.
- 3 | 5

Joining the Base and Building the Structure Once your three 3D textured strips are complete, the next step is to create a mesh-like base at the back using chains and single crochet. This structural support allows you to knit a smooth row of double crochet separated by chain spaces on either side of each strip. When it comes to joining the strips, you have two great design options depending on the look you want to achieve: 1. Flat Join: You can turn the pieces inside out and join them from the wrong side using slip stitches or a needle for a completely smooth and flat transition between the panels. 2. Corded Embossed Join: For maximum texture, you can join the pieces from the right side using a tight row of single crochet. This creates a beautiful, thick corded edge between each strip that perfectly complements the 3D design (25:02). To complete the body of the bag, you will knit two separate flat side rectangles, 28 stitches wide and 4 rows deep, using standard double crochet. These rectangles will form the side gussets and base of your bag, providing ample interior space. To maintain that lovely textured ribbing effect at the outer seams, securely sew them to the sides of the main panel using single crochet stitches.
- 4 | 5

Superior Quality Finishing Touches and Hardware To transform your easy crochet handbag pattern from a simple DIY project into a luxurious accessory, the hardware you choose is everything. Create a clean, sturdy edge by crocheting 3 to 4 rows of single crochet around the top opening of the bag. In the final row, sew directly over the metal eyelets on both sides to securely fasten the metal side eyelets to the fabric. Once the eyelets are attached, attach the gorgeous gold metallic chain strap to give the bag an extremely sophisticated look. For closure, sew handy magnetic snaps to the inside edge. Finally, use a piece of cardboard to wrap your remaining yarn around and make a beautiful, long decorative tassel. Secure the top knot with some hot glue and attach it to the front loop for the ultimate stylish accent. Happy crocheting!
- 5 | 5

Sponsored
Sponsored
Sponsored
Sponsored
Sponsored
Popular Videos



Sponsored